Thursday, June 21, 2012

Use Your Stash Blog Hop - Oldest Paper

If you are joining us for the "Using Up Your Stash Blog Hop" you are on the right track. WELCOME! You should be coming from Wendy's Blog.  If you get lost along the way you can see the entire list of hoppers on Rachel's Blog. Let's get started.

If you are like me, you have a ton of paper that you have horded, so today I am showcasing my oldest Close To My Heart paper.  I’m trying very hard to use up my stash, so I made 2 things this month.  Now, there will be some participants with some really old paper.  I've been with Close To My Heart for only a year, so my paper isn't that old, per se.

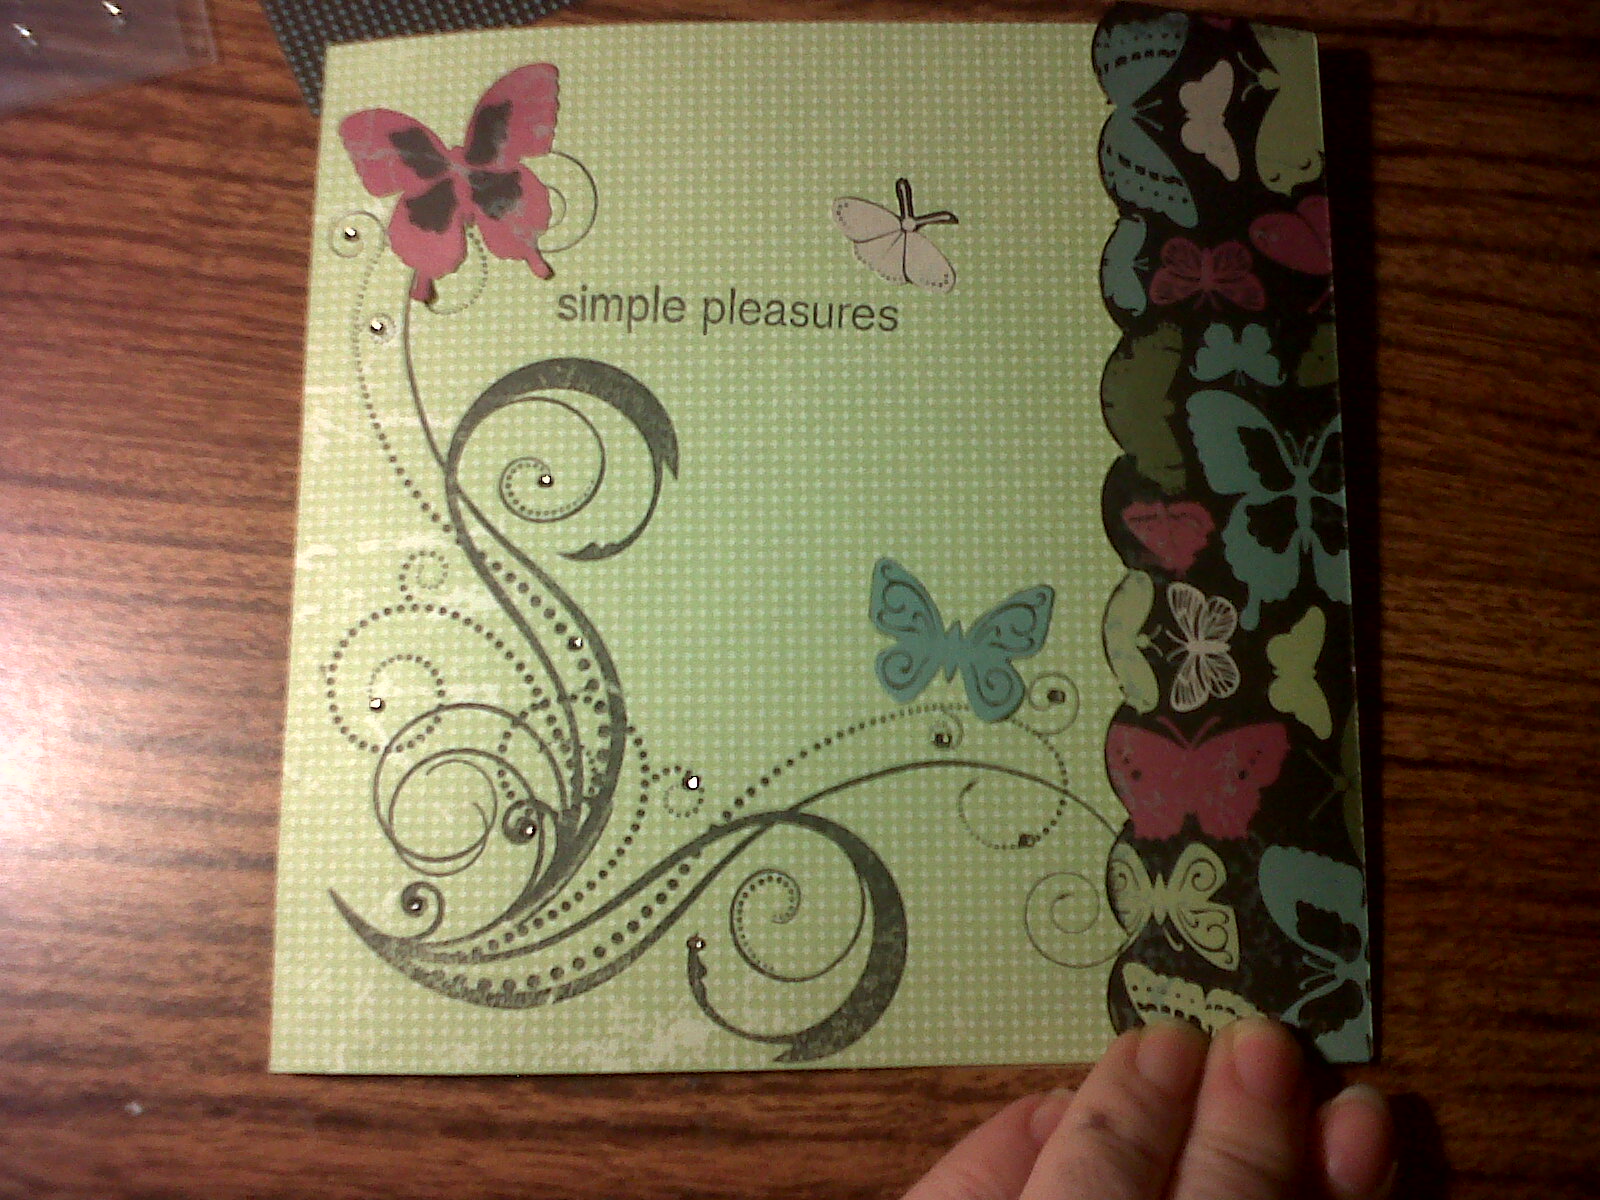
First, I made a card for a group I’m in called RAK – Random Acts of Kindness. Each month we get a different RAK partner and we send something handmade to our partner just to let her know we are thinking of her. The lady I made this card for loves butterflies.  That enabled me to use the Wings paper I had left over from the Spring of 2011. For the card, I used the Die Cut Cards & Envelopes.  I covered the flap of the card in the dark, butterfly covered paper.  The excess paper I cut out different butterflies.  I used the green side of another Wings paper and cut it to fit the other side of the card.  I stamped the green paper with one of my favorite stamp sets, Love Life.  Then, I glued down the butterflies I cut out. 
On the inside of the card, I wanted to do something a little fun.  So, I used both sides the same paper as the majority of the front of the card.  As a base, I cut out and used the black side of the paper.  Then, I cut out a smaller square and turned it so that it was wonky.  I used the Metal Brad Assortment in Black to hold down the wonky turned paper.  I have a punch that punches out super small butterflies., along with 3 other critters.  I punched out 3 butterflies and used the reverse side of the paper, black, to give just a bit more contrast.  Then, I wrote a note to my RAK friend.


The 2nd project I did was a SWAP of bookmarks.  This was fun because we got to just go with it, no theme or anything.  Well, I thought, might as well use more Wings paper, so I did.  I measured about 2 inches wide and about 7 inches long black cardstock.  Then, I used the same green paper from the Wings paper pack as I did for the card, but I cut it about a half inch shorter and a half inch thinner than the black cardstock.  Again, I used the Love Life stamp.  I also punched out a few butterflies using that 4 critter punch.  I adhered the green paper to the black cardstock.  I punched a hole at the top of the bookmark and looped the fuzzy black yarn through the hole.  I glued down the small butterflies and then outlined portions of the flourish with my Stardust Glitz Glitter Gel.  Of course, every girl needs bling, so I added a few extra round Sparkles here and there. 


Ta Da ~ 2 projects done and I used up paper that is over a year old.  Yeah!

Shopping List for the 1st project
Die Cut Cards & Envelopes – Z1474
Love Life Stamp Set – D1482
Black Ink – Z2105
Micro-Tip Scissors – Z534
Metal Brad Assortment in Black – Z1366
Wings paper pack – Retired
4 Critter Punch – don’t remember where I got this

Shopping List for the 2nd project
Love Life Stamp Set – D1482
Black Cardstock – 1386
Sparkles in Round – Z1104
Glitz Glitter Gel in Stardust – Z1313
Wings paper pack – Retired
Single Hole Punch – I’ve had this for years
Fuzzy Yarn – got at local craft store

Now hop on over to Theresa's Blog for more ideas of using up your stash.

Thursday, May 24, 2012

Mark Your Calendars!

Mark Your Calendars!

For the next seven months, I will be hosting card workshops and crops at the Winters Park Assisted Living and Memory Care Center in Garland, Tx.  I’m including all the dates and if applicable, the theme. 

All card workshops, except December, will be 6*8*10.  You will create 6 cards, using only 8 minutes per card, for only $10!  What a fantastic way to have handmade cards, build up your stash of cards, and meet new people!  Crops are free, yes F-R-E-E, so you can come and learn new techniques while completing your projects and scrapbooks.

June 9              6-8pm             Card Workshop
June 29            6-10:30pm       Crop

July 7               6-8pm              Card Workshop
July 30             6-10:30pm       Crop

Aug 12             6-7:30pm         Card Workshop
Aug 25             9-11 am           Back to school crop & bake sale

Sept 8              6-8pm              Card Workshop
Sept 22            6-10:30pm       Crop

Oct 7               6-8pm              Card Workshop – Halloween
Oct 20             6-8pm              Card Workshop – Veteran’s Day

Nov 10             6-8pm              Card Workshop – Thanksgiving
Nov 23             6-10:30 pm      Crop

Dec 1               *** Special Card Workshop *** we will be making Christmas/Holiday
Cards – time to be determined
                                                                                  

Each month, you will need to email me to register and prepay to hold your place for the card workshops.  Crops are a come and go.  I am super excited about this opportunity and would love to have each and every one of you come and join me.

West.mjwest@yahoo.com

Monday, May 21, 2012

Use Your Stash - Mad about Metals

If you are joining us for the "Using Up Your Stash Blog Hop" you are on the right track. WELCOME! You should be coming from Rachel's Blog. If you get lost along the way you can see the entire list of hoppers on Rachel's Blog. Let's get started.

Today I am showcasing Metal accents!  I have a lot of paper left over from last spring, so I used that as well.  The paper is called Mayberry.  The metal charm embellie on the front is from last fall.  Both the paper and the metal charm are now retired.


I needed a card for a friend who is ill, so I just used up some old stuff.
I layered the paper, then used the Natural Hemp to give it a fun twist.  The metal charm is on 3-D Foam tape. 

Close To My Heart Shopping List
Colonial White Cardstock - 1388
Hemp in natural -Z280
Chocolate Ink - Z2111
3-D Foam Tape – Z1151

Thank you for stopping by, now hop on over to Theresa's blog for more great ideas.


Tuesday, May 15, 2012

May's Technique Blog Hop - Yo Yo's

Welcome to our Technique Blog Hop!  This month we are highlighting the “Yo-Yo Flowers” Technique as shown on page 27 in the Spring/Summer 2012 Idea Book!  This blog hop is a great big circle so you can start wherever you want and continue through to see all the fabulous artwork incorporating this technique.  If you are coming from Rachel's Blog, you are on the right track.  Let’s get started!

Here is the card I made for my nephew's baptism.  He is 12 and it is so not cool to have handmade things from his aunt, but I do it anyway because I love him.  He loves the Avengers and all the different super heros, so I used the Superhero paperpack. 

I cut 2 of the borders from the Art Philosophy Cricut cartridge at "fit to page."  Then, I scored them at every 1/4 inch.  Once I scored them, I folded them up (back & forth).  Using the ever popular Liquid Glass, I glued the two ends together in a circle and voila! I had a beautiful star burst for the front of my card.

I embellished with Dimensional Elements Star Shapes.  These I inked in Cranberry, Moonstruck, and Sunkiss Yellow.  On the largest star, I put a "C" for his name using the Hero Alphabet.

Now, hop on over to Judy Faye's blog and check out what she has created.  Don’t forget to post your project on our challenge blog!

Close To My Heart Shopping List:
Hero Alphabet - E1022
Superhero Paper Packet - X7152B
Liquid Glass - Z679
Dimensional Elements - Stars - Z1680
Round Sponge – Z697
Euro Personal Paper Trimmer – Z338
Microtip Scissors – Z534
Cranberry Ink - Z2116
Monstruck Ink - Z2134
Black Ink - Z2105

Thursday, May 3, 2012

May Stamp of the Month

Each month Close To My Heart has a "Stamp Of The Month" special.  When you spend $50, you can add the Stamp Of The Month for only $5!  This is a great way to build up your stamp collection.  Each month, the stamp set is different, and it is always timely!


This month's Stamp Of The Month is called Friendship Bouquet.  Of course, there are always ideas in the Idea Book using the Stamp Of The Month.  However, there are a few Consultants with whom I share my own creation.  Then we all do a virtual Stamp Of The Month Swap and post them on our blogs. 


Michelle West


Judy Faye Garner


Melissa Robinson
She even had the Dotty For You paper as a background!


Sheila Wilkerson


Saturday, April 21, 2012

Use Your Stash - April = Ribbons

If you are joining us for the "Using Up Your Stash Blog Hop" you are on the right track. WELCOME! You should be coming from Bethany's Blog. If you get lost along the way you can see the entire list of hoppers on Rachel's Blog. Let's get started.

Today I am showcasing Ribbons!  If you are like me, you buy ribbon and then never use it.  This was the perfect time to get out my (rather large) stash of ribbon and figure out something to create.   A 2-page spread layout is what I finally came up with.  It is extremely colorful, and well, let’s be honest – a little on the elementary side, My Dear Watson.  But, I like it and I usually don’t go for the less sophisticated-type of project. 

First, I cut about 3 inches from each ribbon I had on hand…. OK, it’s more like about 90% of the ribbon I had on hand, but – I did use most of it.  Then, I cut each ribbon piece in half.  On Colonial White cardstock, I placed a giant yellow circle that I inked around in, surprise surprise, Sunset ink.  I have no idea where I got the large yellow circle.  I was looking through my paper stash and found it.  That is when I decided to make a sun out of the circle.  The first lot of ribbons I had cut in half were then used as the rays on my sun. 


On the 2nd page, I used the other group of ribbons as the stems for flowers.  Next, I inked just about any round-flower’ish looking item I could find and adhered the flower to the ribbon/stem.  Some of the flowers are Close To My Heart products, such as Heirloom Assortment, Just Blooms White Daisy, Bliss Level 2 (retired), and the Dimensional Elements Mixed Shapes.  I also used the Just Blooms Paper Shapes (butterflies).  All of the other flowers are listed below in my Non-CTMH shopping list.


For the saying, I used the Cocktail Alphabet in Black ink. 
This was a pretty easy project, but I had fun being silly with it. 

Close To My Heart Shopping List
Liquid Glass - Z679
Colonial White Cardstock - 1388
Just Blooms Paper Shapes – Z1463
Just Blooms Variety Pack – Z1300
Bliss Level 2 Assortment – Z1355 (retired)
Dimensional Elements Mixed Shapes – Z1683
Heirloom Assortment – Z1635
Bitty Brads Metal Assortment – Z1368
Round Sponge – Z697
Designer Ribbon Pink Collection – Z1384
Designer Ribbon Blue Collection – Z1385
Glitz Glitter Gel – Stardust – Z1313
3-D Foam Tape – Z1151
Micro-tip Scissors – Z534
Tulip Ink – Z2166
Pear Ink – Z2197
Pacifica Ink – Z2192
Cranberry Ink – Z2116
Sunset Ink – Z2191
Spring Iris Ink – Z2148
Parchment Ink – Z2142
Gypsy Ink – Z2190
Sunflower Ink – Z2150
Sunny Yellow Ink – Z2152
Black Ink – Z2105

Non-CTMH Shopping List
* K & Company Wedding Paper Flowers – these were inked in many different Close To My Heart colors
* Recollections Dimensional Flower Stickers
* 23 different types/colors of ribbon that I’ve had anywhere from 1 month to 5 years

Now hop on over to Theresa's Blog for more ideas of using up your stash.

Sunday, April 15, 2012

April Technique Blog Hop

Welcome to our Technique Blog Hop!  This month we are highlighting the Layering a Window” Technique as shown on page 33 in the Spring/Summer 2012 Idea Book!  This blog hop is a great big circle so you can start wherever you want and continue through to see all the fabulous artwork incorporating this technique. 
We would love to see what you’ve created using this month’s technique, please visit our challenge blog  where you can share your project and be entered in a chance to win great prizes.  You will also find a listing of all participants and their blog addresses if you should get lost or want to reference a blog along the way.  Let’s get started! 

Since I needed some Easter gifts, I thought this would be a great way to combine my blog project and gift giving.  I made one in brown/gold and the other in black/silver.  The process was the same for each, just in different colors.


I traced a foam cross onto the cardstock and cut it out using a craft blade.  The cross that was cut out was put aside, as I only wanted the 12x12 paper with a big cross-shaped hole in it. 


Next, I inked the edges of the negative space – using tone on tone ink to paper.  On the Art Philosophy Cricut Cartridge, I used the <Flower 2> Shift, Font Layer and cut it “fit to page.” 


While that was cutting, I used Versamark to stamp the image of “He Is Risen” on the bottom right corner of my 12x12 top sheet.  Then I poured the desired color of embossing powder onto the ink and set it with the heat gun. 


Once the flourish was cut out, I began making my layers.  The very back is the gold or silver sheet, then the flourish, then the top sheet with the embossing. 

As you can see, I took the pictures of the black one before putting it into a frame.  The frames have terrible glare, but I wanted to give you an idea of how the finished product looked.

As I mentioned, I made these as Easter gifts for my family.  The black/silver one is for my brother and sister-in-law and the brown/gold one is for my mother. 


I’d love to hear what you think of my interpretation of the Layering Technique.  Leave a comment, then hop on over to Joy's page to see what she has created this month.

Thank you for stopping by!

Close To My Heart Shopping List:
Art Philosophy Cricut Cartridge Z1686
Black Ink – Z2105
Cocoa Ink – Z2114
Black 12x12 paper 1386
Cocoa 12x12 paper X5642
He Is Risen Stamp set B1397
Round Sponge – Z697
Euro Personal Paper Trimmer – Z338
Edge Distresser - Z1297
Microtip Scissors – Z534
VersaMark Z891

Non-CTMH Shopping List
Gold and Silver paper from The Paper Company
Razor Blade
Frames (brown & black)
Gold and Silver embossing powder
Heat gun